> ## Documentation Index
> Fetch the complete documentation index at: https://docs.getstrada.com/llms.txt
> Use this file to discover all available pages before exploring further.
# Workflows
> Run automations on a webhook or a schedule, outside of a conversation
Workflows run automations that aren't tied to a single conversation. Instead of being triggered by an agent during a call or chat, a standalone workflow runs when an external system calls its webhook, or on a schedule you define.
They use the same node-based builder as your other workflows, so you can query data, run code, call an LLM, and push results to connected integrations.
***
## Creating a Workflow
From **Workflows**, click **New Workflow** and fill in the **Create Workflow** dialog:
* **Workflow Name** - A name to identify the workflow.
* **Description** - A short summary of what the workflow does.
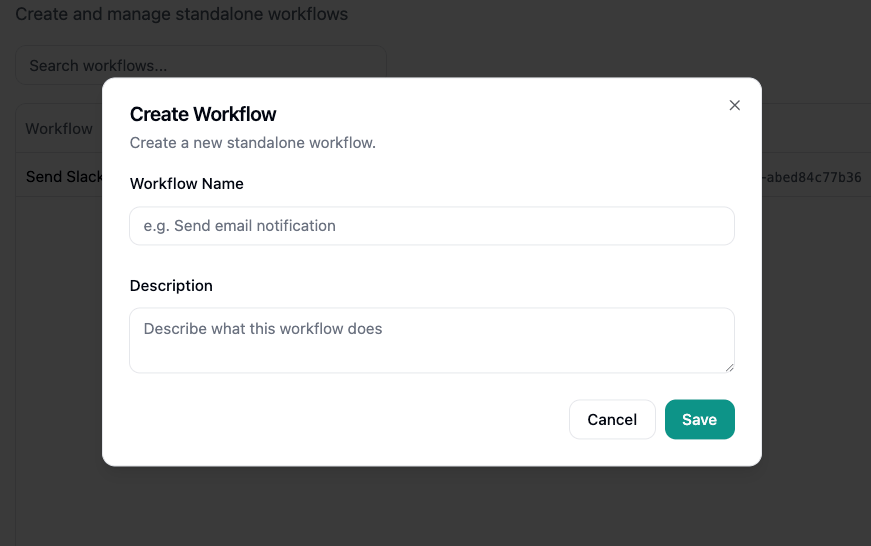 New workflows appear in the list with their name, the apps they use, and a **Workflow ID**. Use the button next to the ID to copy it. You'll need it when triggering the workflow over the API.
Use the row menu to **Edit** the name and description, or **Delete** the workflow.
***
## Building the Workflow
Click a workflow to open the builder. These workflows use the same visual builder as the rest of the platform, so refer to the [workflow builder](/building/conversation-flow/workflows/workflows-overview) for how to add and configure nodes, and the [Node Reference](/building/conversation-flow/workflows/node-reference) for the full node catalog.
New workflows appear in the list with their name, the apps they use, and a **Workflow ID**. Use the button next to the ID to copy it. You'll need it when triggering the workflow over the API.
Use the row menu to **Edit** the name and description, or **Delete** the workflow.
***
## Building the Workflow
Click a workflow to open the builder. These workflows use the same visual builder as the rest of the platform, so refer to the [workflow builder](/building/conversation-flow/workflows/workflows-overview) for how to add and configure nodes, and the [Node Reference](/building/conversation-flow/workflows/node-reference) for the full node catalog.
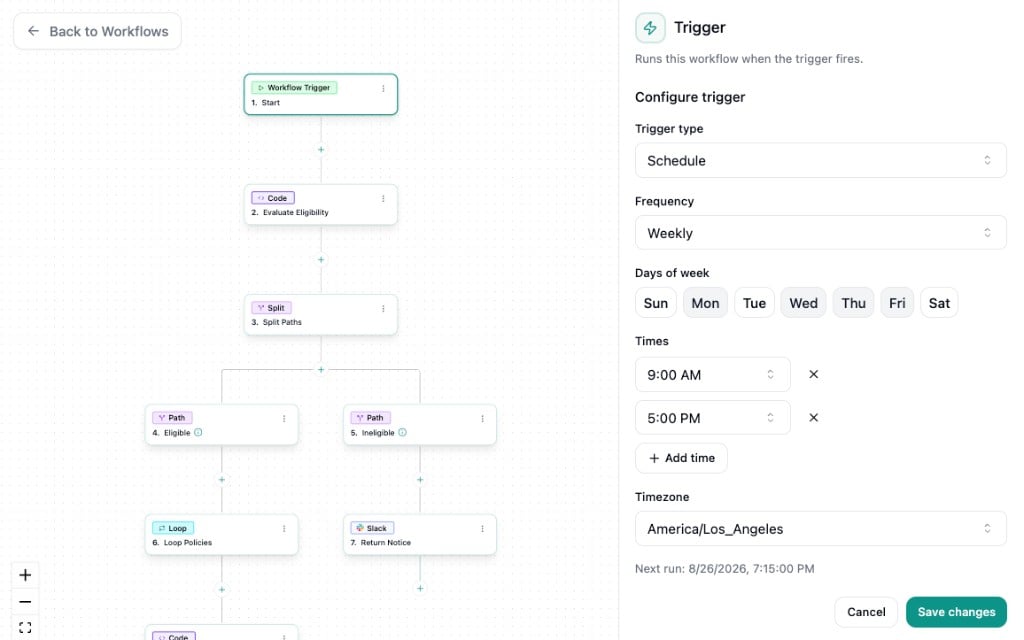 Your edits save automatically as a draft. When a workflow has unpublished changes, a banner appears at the top of the builder:
* **Publish Workflow** - Makes the current version live. A workflow only runs after it has been published.
* **Undo Changes** - Discards unpublished changes and restores the last published version.
***
## Configuring the Trigger
Click the first node in the builder to open the **Trigger** panel. A trigger determines when the workflow runs.
Choose a **Trigger type**:
### Webhook
The workflow runs when an external system sends a request to its webhook.
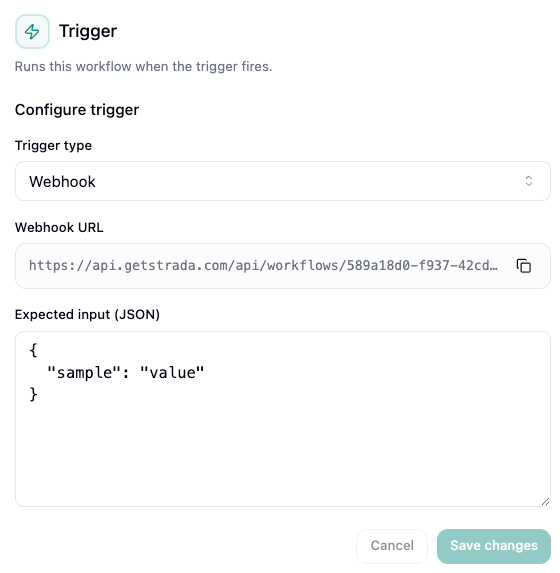
* **Webhook URL** - The address to send requests to. It's generated when you save, and you can copy it with the button.
* **Expected input (JSON)** - A sample of the JSON object you plan to send. This describes the shape of your data so you can reference its fields in the builder. It must be a JSON object.
Your edits save automatically as a draft. When a workflow has unpublished changes, a banner appears at the top of the builder:
* **Publish Workflow** - Makes the current version live. A workflow only runs after it has been published.
* **Undo Changes** - Discards unpublished changes and restores the last published version.
***
## Configuring the Trigger
Click the first node in the builder to open the **Trigger** panel. A trigger determines when the workflow runs.
Choose a **Trigger type**:
### Webhook
The workflow runs when an external system sends a request to its webhook.
* **Webhook URL** - The address to send requests to. It's generated when you save, and you can copy it with the button.
* **Expected input (JSON)** - A sample of the JSON object you plan to send. This describes the shape of your data so you can reference its fields in the builder. It must be a JSON object.
 To trigger a webhook workflow from your own systems, see [Trigger a Workflow](/api-reference/workflows/trigger-a-workflow).
Expected input describes the shape of your data for the builder. It isn't enforced on incoming requests. If a
request leaves out a field, that value is simply empty in the run.
### Schedule
The workflow runs automatically on a recurring schedule.
* **Frequency** - How often the workflow runs: Interval, Daily, Weekly, or Monthly.
* **Times** - The times of day the workflow runs (for Daily, Weekly, and Monthly).
* **Days** - The days of the week or days of the month to run on (for Weekly and Monthly).
* **Timezone** - The timezone the schedule is evaluated in.
After you save, the panel shows the next scheduled run.
To trigger a webhook workflow from your own systems, see [Trigger a Workflow](/api-reference/workflows/trigger-a-workflow).
Expected input describes the shape of your data for the builder. It isn't enforced on incoming requests. If a
request leaves out a field, that value is simply empty in the run.
### Schedule
The workflow runs automatically on a recurring schedule.
* **Frequency** - How often the workflow runs: Interval, Daily, Weekly, or Monthly.
* **Times** - The times of day the workflow runs (for Daily, Weekly, and Monthly).
* **Days** - The days of the week or days of the month to run on (for Weekly and Monthly).
* **Timezone** - The timezone the schedule is evaluated in.
After you save, the panel shows the next scheduled run.
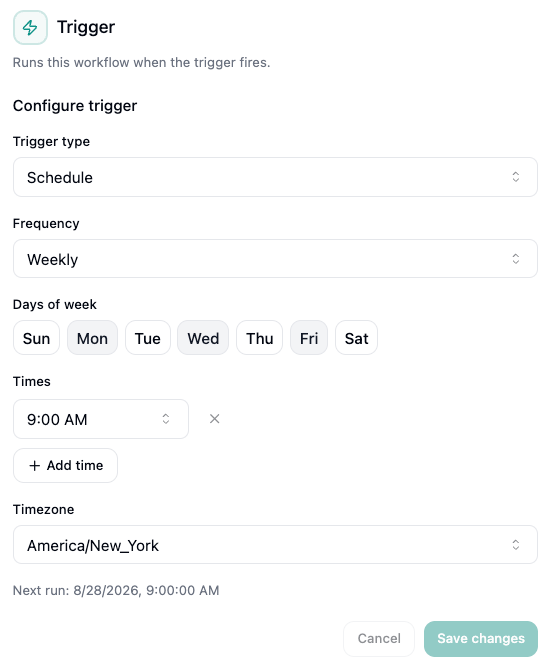 Click **Save changes** to persist the trigger.
***
## Using Variables
Every node can reference data available to the workflow. Type `/` in any configuration field to open the variable picker and insert a value:
* The fields from your webhook's **Expected input**
* Secrets from your organization
* Outputs from earlier nodes in the workflow
***
## Testing
Use **Test Workflow** on a node to run the workflow with sample data before it goes live. Provide test values for the workflow's variables, then run the full workflow or a single step to confirm it behaves the way you expect.
***
## Enabling
A workflow only runs when it is **Enabled**. Use the **Enabled** toggle in the Trigger panel to turn it on or off. Only enabled workflows can be triggered.
For a webhook workflow to run successfully, it must be both **published** and **enabled**. If you trigger a workflow that is enabled but has never been published, the request is accepted but the run won't complete.
Click **Save changes** to persist the trigger.
***
## Using Variables
Every node can reference data available to the workflow. Type `/` in any configuration field to open the variable picker and insert a value:
* The fields from your webhook's **Expected input**
* Secrets from your organization
* Outputs from earlier nodes in the workflow
***
## Testing
Use **Test Workflow** on a node to run the workflow with sample data before it goes live. Provide test values for the workflow's variables, then run the full workflow or a single step to confirm it behaves the way you expect.
***
## Enabling
A workflow only runs when it is **Enabled**. Use the **Enabled** toggle in the Trigger panel to turn it on or off. Only enabled workflows can be triggered.
For a webhook workflow to run successfully, it must be both **published** and **enabled**. If you trigger a workflow that is enabled but has never been published, the request is accepted but the run won't complete.